Sunday, January 9, 2011

MOONG DAL & RICE KHICHDI - A simple meal after the festive season..!

After enjoying the wonderful and festive holiday season, and the scrumptious and mouthwatering meals, snacks and sweets..its time to enjoy a simple, light yet delicious meal of Moong Dal-Rice Khichdi. This simple meal is another one of my family's favorite. This a starter food for little babies by the time they are 8 months old minus the spices. This meal is healthy, easy to digest and provides a good balance of proteins, carbohydrates and fiber. 

For dinner today I am making Dal-Rice Khichdi, and thought it will be a good meal to share with you all. I cook the Khichdi in the microwave, but you can cook this on the stove top if you desire. Hope you enjoy this recipe as much as my family does.


MOONG DAL & RICE KHICHDI

     Ingredients

  • 2 cups Basmati Rice, washed
  • 1 cup Moong Dal, washed
  • 2 tbsp Oil
  • 1 tsp Butter or Ghee
  • 2 tsp Cumin seeds
  • 2 Dried Red Pepper, whole - optional
  • 2 tsp Goda Masala (if not available powder 2 cloves, 2 peppercorns, 1 tsp coriander seeds, 2 tsp cumin seeds in a spice grinder) 
  • 1/2 tsp Turmeric powder
  • A pinch Asafetida
  • 1 1/2 tsp Salt (or according to taste) 


   Directions


  • Combine moong dal and basmati rice in a microwave safe glass bowl. Make sure the bowl is big enough to hold the rice after it is cooked. Ideally the bowl should be at 4 times the combined volume of the rice and water. Wash and rinse well 2-3 times in water.  Add 6 cups warm water and set aside.
  • In a small saucepan, heat 2 tbsp oil.
  • Add cumin seeds, turmeric powder, asafetida, a little of the goda masala.
  • Pour this into the bowl of rice and dal mixed with water.
  • Add salt and mix well.
  • Place in bowl in the microwave and set the time for 22 minutes.
  • Let the khichdi sit in the microwave for 5 minutes after it turns off.
  • Fluff the rice with a fork and serve hot with Sweet Lemon or Spicy Mango Pickle, Indian Papad or Papad Koshimbir (Salad) and Kadhi.


P.S I normally don't make the Kadhi as my picky eaters do not eat yogurt. But I will make it soon and post the recipe.


Below is the recipe for Papad Koshimbir


PAPAD KOSHIMBIR (PAPAD SALAD)


     Ingredients


  • 2 Urad Dal Papad
  • 1 small Onion, finely chopped
  • A pinch of Red chili powder
  • 1 tbsp Lemon Juice.
  • 2 tbsp Cilantro, chopped
  • 1 tsp fresh grated coconut - optional


    Directions


  • Cook the Papad by frying them in oil or roasting over an open flame or microwaving. I roast them over an open flame. For microwaving place the papad on a microwave safe dish and microwave on high until done. Takes about 30-45 seconds. Find your perfect time by trial and error.
  • Crumble the roasted papad in a bowl. Add the onion, red chili powder, lemon juice, cilantro and grated coconut.
  • Mix well and serve with the Khichdi.
  • Prepare the Papad Salad just before serving so it stays crisp.


With this I want to thank all my readers for your support and see you more often this year with delicious but healthy recipes.


Saturday, January 1, 2011

HAPPY 2011 to all my readers...

It is 11:24 pm on December 31, 2010....With 36 minutes to go for the beginning of 2011..its time to make some resolutions..!

As the clock is ticking it is getting harder to put my thoughts into words. Many of us make a list of the resolutions we intend to achieve by the end of the year. But how many of us achieve what we have planned. One of the things I have learned over the years is that we should set goals that are realistic and achievable rather than ambitious. 

The best decision I made this year I think was to quit my second job as a Tax Preparer. I loved it, but given the time I spent away from my family and the effect on my health - it was definitely not what I wanted. Now I am much more at peace with myself, as I can spend more time with my family and pursue my passion for art, cooking (not so much of a passion really, but I do like to cook) and writing.

So with that here are my resolutions for 2011..

Have fun - something that had taken a backseat in the last few years.

Focus on finishing projects that I have started.

Write my blog as often as I can.

Make healthier but fun meals for the family.

Last but not the least .. take good care of myself so I can take good care of my family..

Whooo it is 12:02 am on January 1, 2011..

Wising you all a very HAPPY NEW YEAR.....

Signing of with the promise to see you all with exciting but healthier recipes in the new year :) 

Friday, December 31, 2010

Home-made KAJU KATLI - To satisfy your sweet tooth..!

Kaju Katli is an Indian sweet made from Cashews, Sugar, Cardamom powder, Saffron and Butter or ghee. A sweet treat my family loves so much. Unlike 50 years ago, Indian food is available in plenty in the US. But my kids still love the Brijwasi's Kaju Katli from India and look forward to recieving the box of Kaju Katli in the mail from our friend Prasad. 

Salil suddenly gets into the mood of taking charge of the kitchen, which gives me time to do stuff I like to do other than cooking.
Last Sunday he decided to make Kaju Katli and spent a few hours browsing you tube for recipes until he found the simplest recipe for Kaju Katli.
It was so delicious, by the time we came home from work on Monday evening, Varun had finished all except 3 peices he left for Salil, Riya and me.


True its not good for your diet..but its sure is good for the soul......and to indulge once in a while is absolutely fine.
So today I'd like to share this simple recipe for Kaju Katli with you all..


So go all out and enjoy this delicious sweet treat...


KAJU KATLI (CASHEW FUDGE)


     Ingredients
  • 500 grams Cashew powder
  • 250 grams Sugar
  • 200 ml Water
  • 1 tsp Cardamom powder
  • 2 tbsp Butter / Ghee
  • A few strings of Saffron (optional)


     Directions

  • Grind cashews to a fine powder in a blender.
  • In a saucepan boil water and sugar until you get a syrup with three thread consistency (Teen tari paak as they in Marathi).
  • Melt butter and add to the sugar syrup.
  • Add cardamom powder and saffron. Mix thoroughly.
  • Let it cool a little so you can knead it well. Roll to about a quarter inch thickness. 
  • Cut into diamond shapes


Enjoy this delicious treat with your family..


See you again soon......!


Sunday, December 12, 2010

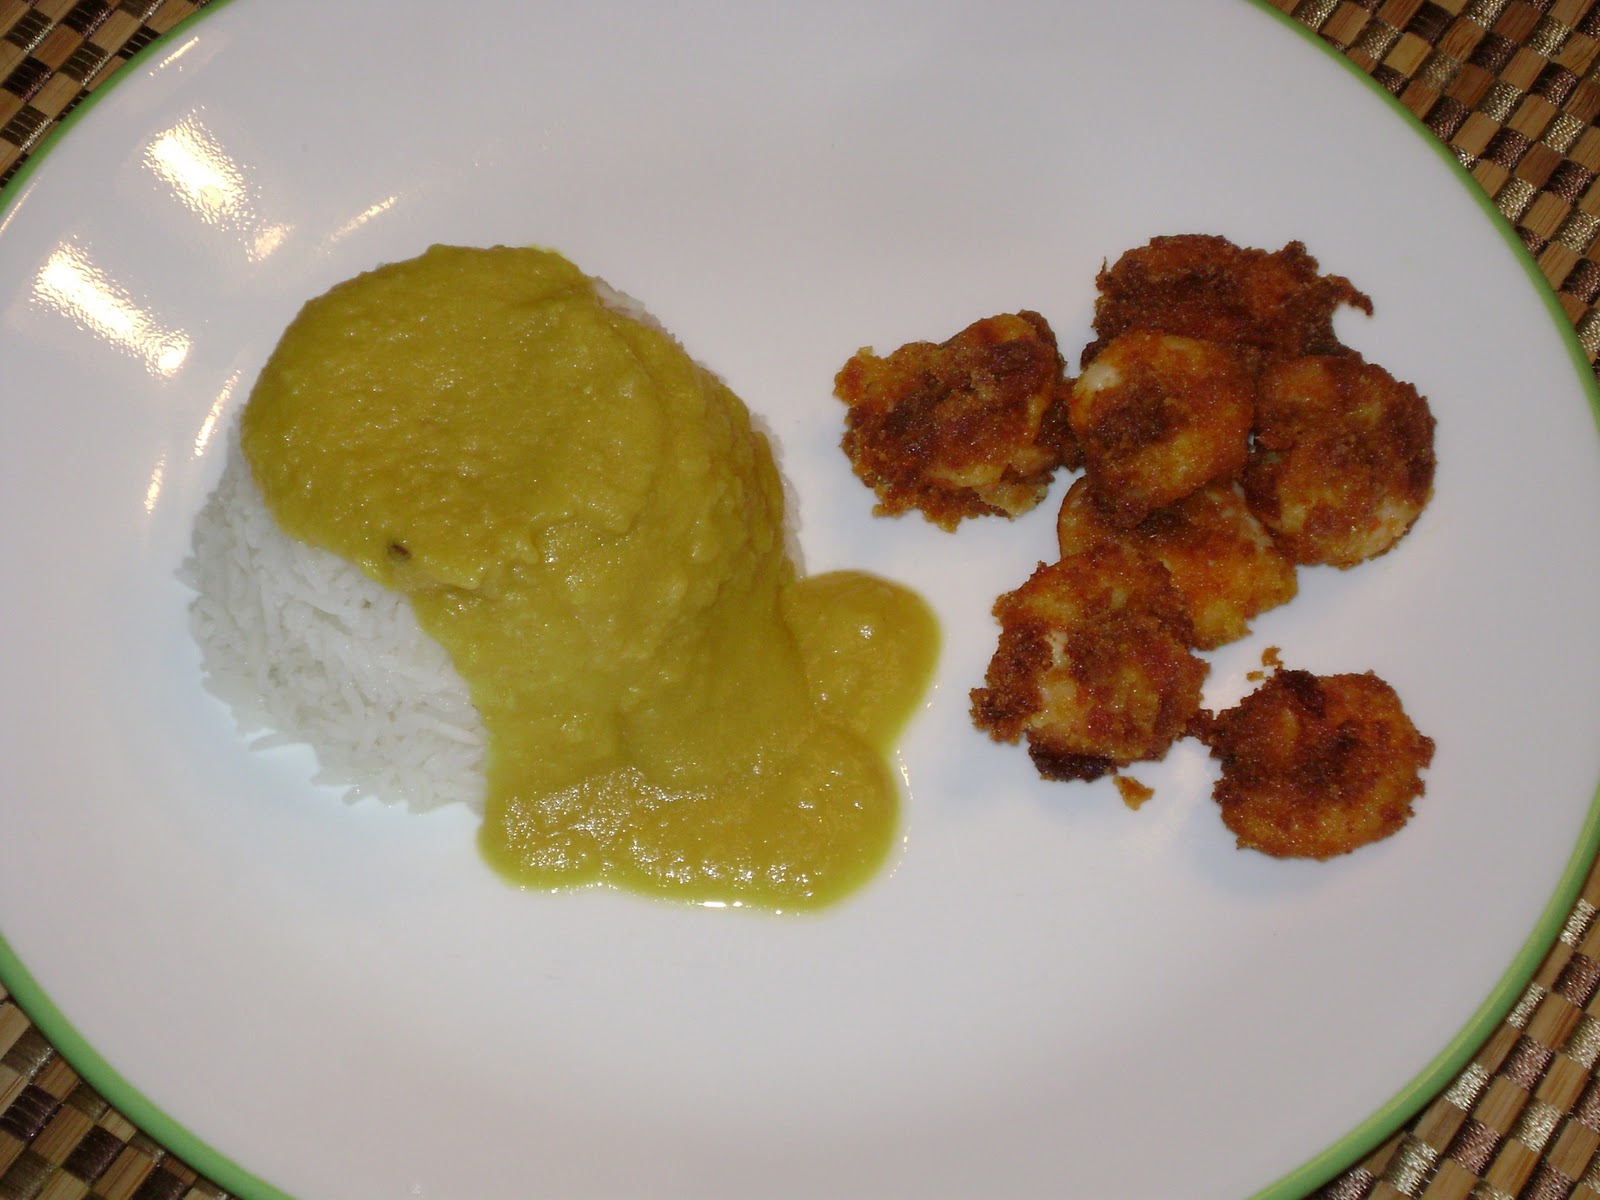
VARAN, BHAT (Dal - Rice) & FRIED SHRIMPS - A simple yet delicious meal...!

I do not need to serve an elaborate menu (Panch-Pakwana) to satisfy my picky eaters. A simple, but most comforting meal of Varan-Bhaat and Fried Shrimp (Curry, Rice and Fried Shrimp) works well.

Dal is a preparation of dried lentils, beans or split pulses, and is  an important part of the Indian cuisine - and Varan is the simplest form of the different kinds of dals.. It is eaten with rice, roti (an indian flatbread) and vegetables. Dal is a good source of protein for a balanced diet containing little or no meat. There are many varieties of Dal - Toor Dal, Chana Dal, Moong Dal, Masoor Dal, Urad Dal - to name a few.

Today lets start with the basic but most relished, comforting and simple form of Dal - VARAN..

VARAN
    Ingredients
  • 1 cup Toor Dal ( Yellow piegon peas)
  • 3 cups Water
  • 3/4 tsp Turmeric Powder
  • 1/2 tsp Asafetida
  • 1tsp Jaggery
  • 2 tsp Ghee (Clarified Butter) - I add just 1 tsp ghee to the varan for the sake of dieting and allow everyone to add more if desired to their serving.
  • 1 Lemon - cut into 8 pcs - to sprinkle on the varan-bhat if desired
  • Salt according to taste
    Directions
  • Wash the toor dal 3-4 times. Add 3 cups water and cook in a pressure cooker for up to 5 whistles. The softer the dal the better it tastes.
  • Pour the cooked dal in a saucepan. Add some water if desired depnding on the consistency you want. 
  • Add turmeric powder, asafetida, salt and jaggery, mix well and let it boil on medium heat for 6-8 minutes. Add ghee and turn off the heat.
  • Serve hot with rice, papad, pickle, and potato fritters. My family loves fried shrimp with varan-bhat.
RICE
No fuss dish is what I call plain rice. You can use any kind of rice you like, but Basmati tastes best with varan.
Ingredients
  •  2 cups Rice
  • 4 cups Water

Directions
  • Wash rice in a microwave safe glass bowl. 
  • Add the required quantity of water ( twice that of rice)
  • Cook in the microwave for 14 minutes.
  • Cook for another 3 minutes.
  • The rice is nice and fluffy and ready to be served.

FRIED SHRIMPS

     Ingredients
  • 30 medium Shrimps - cleaned, deviened and washed
  • 2 tsp Red Chili Powder (for medium spicy) - If you prefer more or less spicy add chili powder accordingly
  • 1/2 tsp Turmeric Powder
  • a pinch of Asafetida
  • 1/2 tsp Garlic powder
  • 1/4 tsp Ginger powder
  • Salt according to taste
  • 1 cup Rice Flour to coat the shrimps before frying
  • Oil for shallow frying


    Directions
  • Mix chili powder,turmeric powder, asafetida, garlic powder, ginger powder and salt in a bowl and add some water to make a thick paste.
  • Add the shrimps coat well with the spice mix (masala).
  • Heat oil in a pan.
  • Dip the marinated shrimps in rice flour and shallow fry for about 3-4 minutes on medium heat.
  • Turn the shrimp and fry for another 2-3 minutes.
  • Remove on a plate lined with a paper towel so the excess oil gets absorbed.
  • Serve hot with Varan and Bhat.


For my vegetarian friends you can make potato fritters instead of fried shrimp.
Follow the same method and ingredients for the shrimp. Instead of the shrimp use potatoes. Peel the potatoes and cut into 1/4 inch thick slices. Rinse in water, drain and pat dry with a paper towel. Coat with the same spice mix as the fried shrimp and follow the same procedure.


Enjoy your meal and see you again soon...with some Holiday treats..!

Friday, November 19, 2010

Sabudana (Tapioca) Khichadi - A feast when you are fasting.

Sabudana (Tapioca)is usually consumed when fasting, prepared either as 'Khichadi", 'Kheer (Pudding)', or Vada ( mixed with potatoes and other ingredients and deep fried in oil). But it can be enjoyed as a snack for breakfast or as a light meal. Sabudana Khichadi is one of the dishes that my picky eaters love...so much, that my son Varun, who is a total non-vegetarian will not even ask for Chicken when Sabudana Khichadi is on the menu. Last weekend when Varun was home we made all his favorite dishes. When I make Sabudana Khichadi, it becomes an all day meal for my family..(breakfast, lunch and dinner).

Today I want to share the recipe for Sabudana Khichadi with you.

SABUDANA (TAPIOCA) KHICHADI

      Ingredients

  • 1 lb Sabudana ( Tapioca - large pearls)
  • 2 tbsp Butter or Ghee (clarified butter)
  • 2 tbsp Olive oil
  • 1 medium Potato, peeled and cubed
  • 1 1/2 cup Roasted peanut powder
  • 3 Green chilies
  • 1 tbsp Cumin
  • 1 tbsp Lemon juice
  • 1/2 cup Cilantro, chopped
  • 2 tbsp Shredded coconut, optional. 
  • Salt to taste 
  • A pinch of sugar

     Directions

  • Wash the sabudana (tapioca) a couple of times in waterand drain. Add 1/2 cup water and let soak for upto 10 hours. If you plan to make the khichadi in the moring soak the Sabudana at night.
  • Roast the peanuts on medium heat until they are slightly brown. I roast them in the microwave for about 6 minutes 1-2 minutes at a time. When they cool down powder them in a blender.
  • Heat the butter in a saucepan. When the butter melts add olive oil.
  • When the oil is ready, add the cumin seeds. They should start spluttering.
  • Add the green chilies and potatoes. Let the potatoes cook well.
  • Meanwhile mix the roasted ground peanuts, salt and sugar with the soaked sabudana (tapioca)
  • When the potatoes are cooked add the soaked sabudana (tapioca) mixture and mix well. Keep stirring the mix for 4-5 minutes on medium heat. 
  • Add the lemon juice and chopped cilantro and mix well. Keep stirring gently, but continuously until the sabudana (tapioca) turns translucent.This may take another 6-8 minutes. If you dont stir continuously the sabudana will stick to each other.
  • Garnish with fresh shredded coconut 9optional) and serve hot for breakfast, lunch or dinner, or as a snack
I have to make enough khichadi to last all day. I hope you enjoy as much as my family does..!
In the next few days I will see you all with a simple meal of Dal, Bhat and Fried Shrimp (Dal is a curry made from yellow pigeon peas and Bhat means Rice in Marathi)

Accha to hum chalte hai.....(Translates to 'Well then, let's go')

Saturday, November 13, 2010

Its Time For Some Italian Food...!

When you have a family of very picky eaters, dishing up a meal that can satisfy every one's gastronomical senses is a real challenge - specially if you, like me, cannot be tied to the kitchen all day. I do like to cook an occasional fancy meal, but weekdays are quick meal days. My husband Salil is a good cook too, and we make sure that we involve the kids to help us in the kitchen. As a result, my children Varun and Riya, have started enjoying to cook and can come up with some really delightfully tasty recipes.

Riya makes delicious Italian Shrimp and we all love it. She calls it 'Riya's Italian Shrimp' and for the preparation she uses Spicy Spaghetti Seasoning, and a little of this and a little of that. My family likes the Shrimp with Pasta and Corn. For the Pasta I came up with a recipe with some veggies and cheese and of course, the spaghetti seasoning. The kids love this recipe and wont eat pasta made with store bought sauces...(how I wish they would once in a while eat pasta with Barilla marinara sauce, which I love).

Varun is coming home this weekend, so Riya wants to prepare her special dinner of Italian Shrimp and Pasta.  I would like to share with you the recipe for 'Riya's Italian Shrimp', Pasta, Corn and Italian Vegetables (specially requested by my niece Salome).

RIYA'S ITALIAN SHRIMP

     Ingredients


  • 1 lb medium Shrimp, shelled and cleaned
  • 2 cloves Garlic, finely chopped 
  • 2 tsp Spicy Spaghetti Seasoning
  • 2 tbsp Olive oil
  • 1 tsp Lemon Zest
  • 1/2 tsp Lemon Juice 
    Directions

  • Heat olive oil in a saucepan. 
  • Add the garlic and stir for a minute until light yellow.
  • Add the shrimp and stir well.
  • Add the spicy spaghetti seasoning, lemon zest and lemon juice.
  • Cook for about 6-8 minutes until the shrimp are cooked.
  • Serve with Pasta and Corn

PASTA

     Ingredients


  • 2 cups Barilla Cellentani or any other pasta you choose. I prefer Barilla.
  • 1 Onion, sliced
  • 2 cups Spinach, chopped
  • 1/2 cup Red Bell Pepper, cut into small squares
  • 1/2 cup steamed Broccoli - optional
  • 1 clove garlic, finely chopped
  • 1 tbsp Olive Oil 
  • 2 tbsp Spicy Spaghetti Seasoning 
  • 1/4 tsp Red Chili Flakes (optional)
  • 1 cup shredded Four Cheese (Kraft)
  • 1/2 cup shredded Mozzarella Cheese


    Directions


  • Bring a large pot of water to boil. Add the Cellentani and cook for about 8-10 minutes or as per instructions on the pasta package. Drain the pasta in a colander and sprinkle some cold water and let drain. This prevents the pasta from sticking to each other.
  • Heat olive oil in a large skillet. Add finely chopped garlic and sliced onions and cook until the onions turn slightly golden. Add the spicy italian seasoning and red chili flakes and stir well.
  • Add red bell pepper and stir for 2-3 minutes. 
  • Add chopped spinach and let cook for a few more minutes.
  • Add the steamed Broccoli.
  • Add shredded four cheese and mozzarella cheese and mix well. 
  • Reduce the heat and cover for 2 minutes so that the cheese melts.
  • Serve hot with Italian Shrimp, Corn and Vegetables.
PS - Spicy Italian Seasoning contains salt, so there is no need to add salt, but you may add a little if desired.


CORN

     Ingredients

  • 2 cups Shelled Corn, frozen
  • 1 tbsp Butter
  • 1 tsp Pepper
  • Salt to taste

     Directions


  • In a microwave safe glass bowl, combine corn, 3/4 cup water, salt and pepper and cook for 6 minutes. 
  • Add butter, mix well and cook for another 2 minutes.
  • The corn is ready to be served. 


STIR FRY VEGETABLES WITH SPICY SPAGHETTI SEASONING 

Salome..this one is for you....

       Ingredients
  • 1 medium Onion, cut into squares
  • 1/2 cup Red Bell Pepper, diced 
  • 1 cup Zucchini, diced
  • 1 cup Broccoli florets, steamed
  • 2 cloves Garlic, finely chopped
  • 2 tsp, Spicy Spaghetti Seasoning 
  • 1 tsp fresh Basil, chopped
  • 1/4 cup Shredded Mozzarella Cheese

      Directions

  • Heat olive oil in a saucepan.
  • Add garlic and onions and stir for a couple of minutes. 
  • Add red bell pepper, zucchini and broccoli and mix well. 
  • Add the spicy spaghetti seasoning an basil. Mix well and cook for a couple more minutes.
  • Add the shredded mozzarella cheese and mix well. Cook until the cheese melts. 
  • Serve hot with Riya's Italian  Shrimp and Pasta


With this I take your leave...See you again soon with some simple mouth-watering recipes.

Phir Milenge .......


Sunday, November 7, 2010

Bhakri-Chutney

After savoring a variety of sweets and snacks like Chiroti, Rava Ladoo, Besan Ladoo, Beet-root Vadi, Chivada, since the last few days and a delicious lunch at Salil's aunts place, we didn't want to even think about FOOD for a while. At such times the humble flat bread from Maharashtra - BHAKRI - is a treat. So I thought that Bhakri-Chutney with some chili pickle would make a good meal for dinner.

Bhakri is mostly made with Jowar flour, Bajri flour, Nachni flour or Rice flour mixed with water. It is traditionally the farmers food in India and served with Pithala ( curry made with gram flour), Thecha ( green chili and garlic chutney),  Coconut-Garlic Chutney, any leafy vegetable (spinach, methi, amaranth) or Stuffed Eggplants. So before I share the recipe for Italian Shrimp, lets make a simple meal of Bhakri-Chutney. My friend Neeta sent me the recipe for 'Thakku' (commonly known as Thecha). With her permission, I am sharing Neeta's recipe for Takku. My great-grandmother served Bhakri with Pithala and Garlic Chutney.  
Making a perfect bhakri needs a lot of practice. I definitely cannot make the perfect bhakri, but it is edible.  :) 

 BAJRI BHAKRI

       Ingredients

  • 2 cups Bajri flour
  • 1/2 tsp Salt
  • 1 1/2 cup warm water - more if needed
  • Water in a bowl on the side to spread on the bhakri.  

      Directions

  • Mix 2 cups bajri flour with salt. 
  • Add water a little at a time and knead well to make a soft pliable dough. The dough should be kneaded for at least 6-8 minutes.
  • Roll the dough between your palms to make a ball and flatten it.
  • Heat a griddle.
  • Spread some dry bajri flour on wax paper in  a large flat plate and place the flattened ball in it. 
  • Apply some flour on your palms and gently press the dough ball to flatten it. Move the dough ball in a circular motion as you flatten it. (wax paper makes it easier to move it) and make sure it does not stick to the plate.
  • Lift the bhakri on your palm and place it on the hot griddle. Apply some water on the bhakri by hand.
  • After a couple of minutes, turn the bhakri around and cook for a couple of minutes on the other side.
  • When you see brown spots on the bhakri, remove it from the griddle and put it directly on the gas. The perfect bhakri will puff well, but if it does not, there is no need to worry. It still tastes good.
  • Serve with garlic chutney and sliced onions.
  • Bhakri is a tastes good with spicy chicken and mutton dishes too.  
 Let us continue with the recipe for Garlic Chutney.......


GARLIC CHUTNEY

       Ingredients

  • 1 cup Grated coconut
  • 2 Green chilies ( You can use red pepper powder instead of green chilies.)
  • 1/4 cup Coriander leaves (Cilantro)
  •  2 cloves of Garlic 
  • 1 tbsp Lemon juice 
  • 3/4 tsp Salt
  • A pinch of sugar
  • A pinch of Asafetida (Hing)

      Directions

  • Mix all the ingredients together and blend to a fine paste in a grinder.


NEETAS RECIPE FOR TAKKU (THECHA)

De-seed some Green Tamarind & crush it in a pestle with some green chillies and some salt Leave it a bit coarse to give it that rustic consistency. 
Season this with some Mustard seeds and curry leaves. Simple, but can spice up Varan Bhaat.
Good to serve with bhakri too. 

Enjoy a simple meal of bhakri and chutney until I see you again...this time with my daughters recipe for Italian Shrimp for sure....


Adios ......